An inventory (item) record can be edited or created within Micronet.
To edit an existing item:
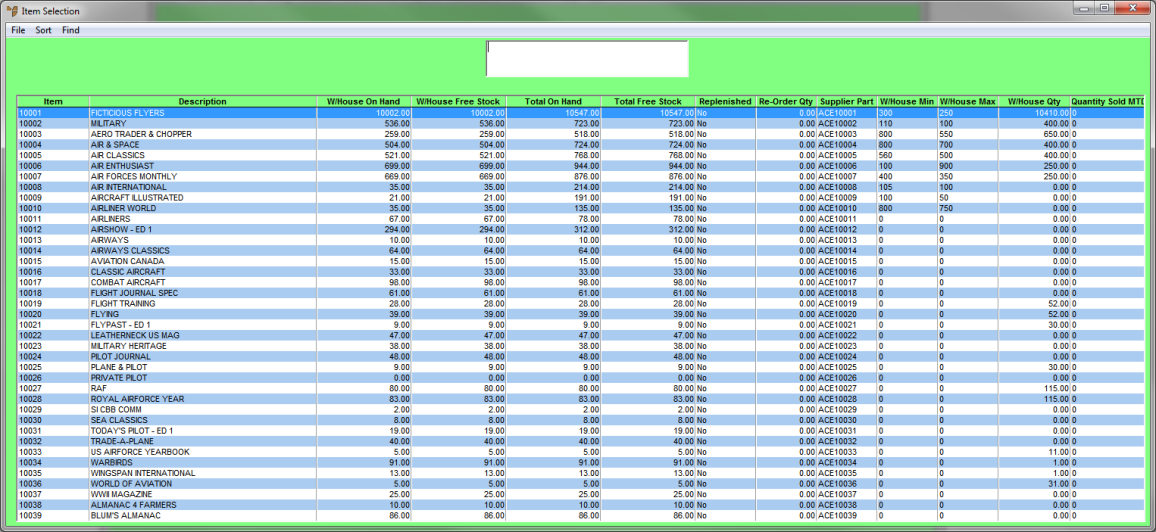
Micronet displays the Item Selection screen.
|
|
|
Technical Tip Any warehouse details displayed on this screen, e.g. W/House On Hand or W/House Free Stock, show information for your default warehouse. |
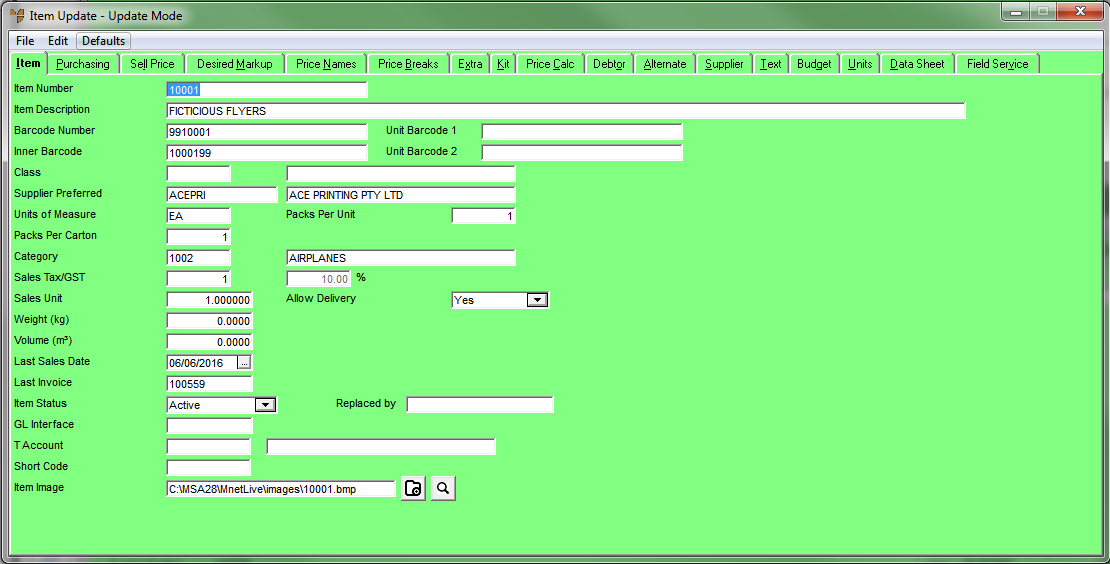
Micronet displays the Item Update screen in Update Mode.
To create a new item record:
Micronet displays the Item Update screen.
The Item Update screen changes from Update Mode to Add Mode as displayed in the title.

|
|
Field |
Value |
|
|
Item Number |
If Micronet has been setup to generate automatic item numbers, this field displays AUTO and the next available item number displays next to the Take Next Number button. Select the Take Next Number button to take the next number for this item. If Micronet is not setup for automatic item numbers, enter a unique number for new items based on your company's item numbering conventions. |
|
|
Item Description |
Enter a description of the item up to 75 characters. This description is printed on invoices, picking slips and other relevant documents. |
|
|
Category |
Enter the product category for this item. You can also press Tab or Enter to select a category. This provides an alternative means of grouping items for discounts, reports and inquiries. |
|
|
Item Image |
If you want an item image displayed on item inquiries, enter or select the path and filename. Embedding product images is covered in more detail in the Advanced Distribution Training Manual (refer to "Embedding Product Images"). |
